Skip the Export: Why Blender's Built-In Compositor Is the Post-Processing Powerhouse You've Been Ignoring
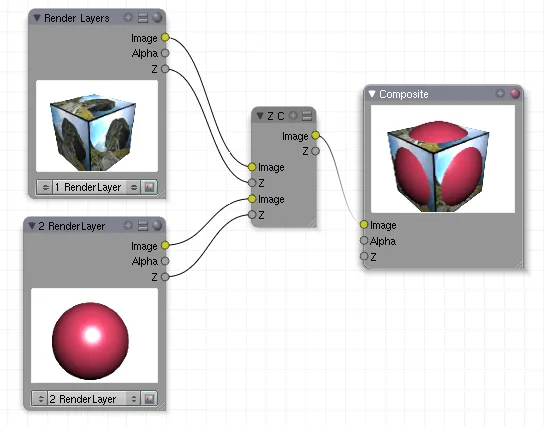
Photo: Toni Grappa, CC BY-SA 3.0, via Wikimedia Commons
Here's a habit a lot of Blender artists share: they spend hours getting a render just right, hit F12, wait for Cycles to finish cooking, and then immediately open Photoshop or After Effects to do the "real" finishing work. Color grading, glare, lens distortion, depth of field tweaks — all done outside the software that already has all of that data baked in and ready to use.
It's not that those external apps are bad. Photoshop is Photoshop. After Effects is industry-standard for motion work. But the reflexive assumption that post-processing has to happen outside Blender is increasingly outdated — and in a lot of cases, it's actually making your pipeline slower and your results worse.
Let's dig into why.
The Problem With Exporting First
When you export a render to a flat image file — even a 16-bit EXR — you're collapsing a ton of useful data. Blender's render engine generates render passes: separate channels for diffuse light, specular highlights, shadows, ambient occlusion, depth, normals, and more. If you composite inside Blender, every single one of those passes is available to you as a separate node input. You can adjust specular intensity without touching diffuse. You can pull fog from depth data without hand-painting masks. You can correct shadow density independently.
Once you flatten to a PNG and open it in Photoshop, all of that information is gone. You're working with a single merged layer, and anything you want to isolate requires manual masking or guesswork. That's not a Photoshop problem — it's a data problem. You threw away the good stuff before you even started.
What the Compositor Actually Does Well
Blender's Compositor has been quietly improving for years, and the node-based interface gives you a level of control that most artists never bother to explore. Here are a few things it genuinely handles well:
Glare and lens effects. The Glare node isn't just for bloom — it includes fog glow, streaks, and ghosts, all physically motivated and adjustable after render time. Trying to fake lens streaks convincingly in Photoshop takes real effort. In the compositor, it's a node connection and a threshold value.
Depth of field post-processing. Blender can render depth-of-field in Cycles natively, but sometimes you want to adjust the focus point after the fact without re-rendering. The Defocus node combined with your depth pass gives you that flexibility — and it's fast because it's operating on existing data, not recalculating light transport.
Color grading with scene-linear data. This is a big one. Blender works in scene-linear color space throughout the render pipeline. When you apply a color correction node inside the compositor, you're operating on linear light data before it gets tone-mapped. That means your adjustments behave the way they would in real light — boosting exposure doesn't blow out differently colored channels unevenly the way it often does in 8-bit editing software.
Chromatic aberration and vignetting. Both are trivially achievable with a few nodes and give your renders a less clinically perfect look without any roundtripping.
The Performance Side of Things
Here's where a lot of people get tripped up: Blender's compositor can feel slow, especially on complex node trees with large renders. But there are a few things you can do to fix that.
First, enable the GPU compositor. As of Blender 3.5 and beyond, the compositor has experimental GPU acceleration. Go to Preferences > System and look at the compositor section. Switching to GPU can dramatically cut processing time on most modern setups.
Second, use the viewer node strategically. Viewer nodes force the compositor to evaluate the entire tree up to that point every time you make a change. If you've got multiple viewer nodes scattered through a complex setup, you're triggering redundant evaluations. Keep one active at a time while you're dialing things in.
Third, work at reduced resolution during setup. The compositor respects the render resolution percentage setting. Drop it to 25% or 50% while you're building out your node tree, then switch back to 100% for your final bake. This alone makes iteration dramatically faster.
Fourth, cache your base render as a multilayer EXR. If you're doing a lot of compositor work, re-rendering from scratch every time you tweak a node is a massive time sink. Render once to a multilayer EXR file, then use an Image node to load it back in. Your compositor will process that cached file instead of re-rendering, and you can iterate on post-processing at node-evaluation speed rather than render speed.
When External Software Still Makes Sense
This isn't an argument that Blender replaces everything — let's be straight about that.
If you're doing heavy retouching with content-aware tools, frequency separation, or detailed hand-painted adjustments, Photoshop is still the right tool. Blender's compositor doesn't have a paintbrush.
If you're cutting a full motion piece with audio sync, multiple footage sources, and complex timing work, After Effects or DaVinci Resolve is the right environment. Blender's video sequence editor is functional but not where you want to be for professional editorial work.
And if you're delivering assets to a larger team with an established pipeline — say, a VFX studio using Nuke — obviously you're working in that pipeline's software. No argument there.
But for the solo artist or small studio doing still renders, product visualization, archviz, or even short animated sequences entirely within Blender? The reflex to immediately bounce out to another app deserves some scrutiny.
A Smarter Workflow
Here's what a more integrated approach actually looks like in practice:
Render to a multilayer EXR. Load it back into the compositor via an Image node. Set up your render passes — at minimum, you want Combined, Depth, and a few light path passes depending on your scene. Build your composite incrementally: start with exposure and color grading, then add lens effects, then any glow or atmospheric work. Use the backdrop viewer to get a live preview as you go.
When you're happy with the result, you can either output a final PNG/JPEG for delivery or — if you're still doing some hand work in Photoshop — export a 16-bit TIFF at that stage, after the compositor has done the heavy lifting. That way you're bringing finished, color-correct, composited data into Photoshop rather than raw render output, and you're doing much less work there.
The Bottom Line
The external software habit isn't wrong — it's just often unnecessary, and it costs you the render pass data that makes targeted adjustments actually work. Blender's compositor isn't a toy anymore. It's a legitimate post-processing environment that operates on the full depth of your render data, integrates natively with your scene, and — with a few optimization tricks — runs fast enough for real production use.
Give it a serious shot before you hit export next time. You might be surprised how much of your Photoshop routine you can handle without ever leaving your .blend file.